

Introduction
Thinking about sharing your thoughts online? Blogging is a fantastic way to express your ideas and connect with others. In this guide, we’ll take you through the process of logging into WordPress and crafting a blog post. Whether you’re a complete beginner or just need a refresher, we’ve got you covered. Ready to dive in?
Prerequisites
To get started, make sure you have:
- A stable internet connection.
- Access to a computer or mobile device.
- Your WordPress login credentials (username and password).
- The URL for your WordPress site (yourwebsite.com).
Logging into WordPress
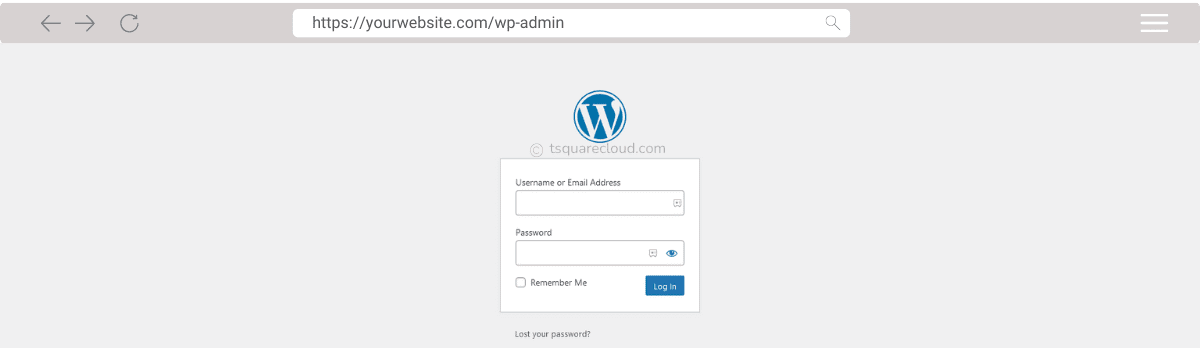
- Open Your Browser: Launch your preferred web browser and enter your WordPress site’s URL (yourwebsite.com) in the address bar.
- Access the Login Page: Append
/wp-adminto your site URL (e.g., yourwebsite.com/wp-admin) to reach the login page. - Enter Your Credentials: Input your username ([username]) and password, then click “Log In” to access your dashboard.
- Consider Two-Factor Authentication: For added security, set up two-factor authentication if available.
Creating a New Blog Post
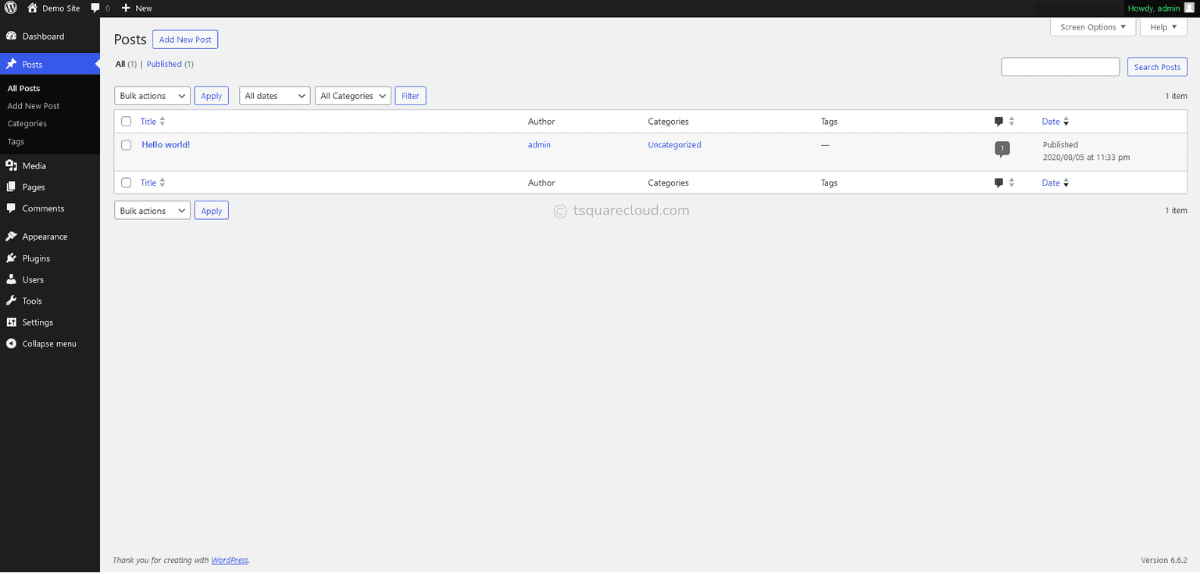
- Navigate to Posts: Once logged in, find ‘Posts’ in the left sidebar. Hover over it and select ‘Add New Post’.
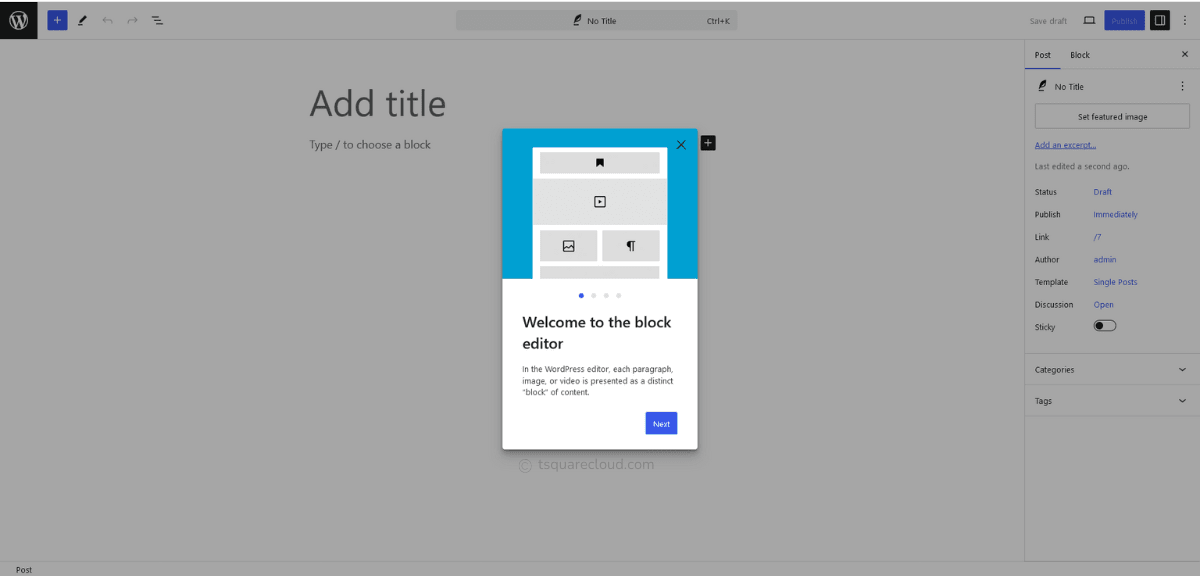
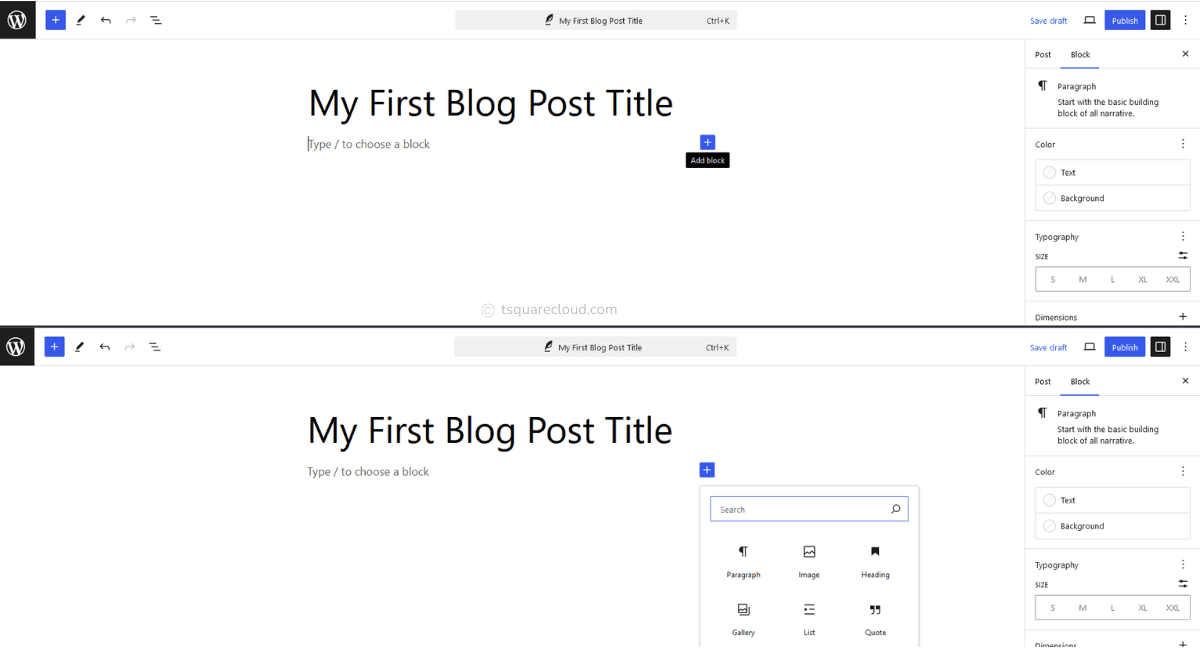
- Create Your Title: In the ‘Add title’ field, craft an engaging title for your blog post.
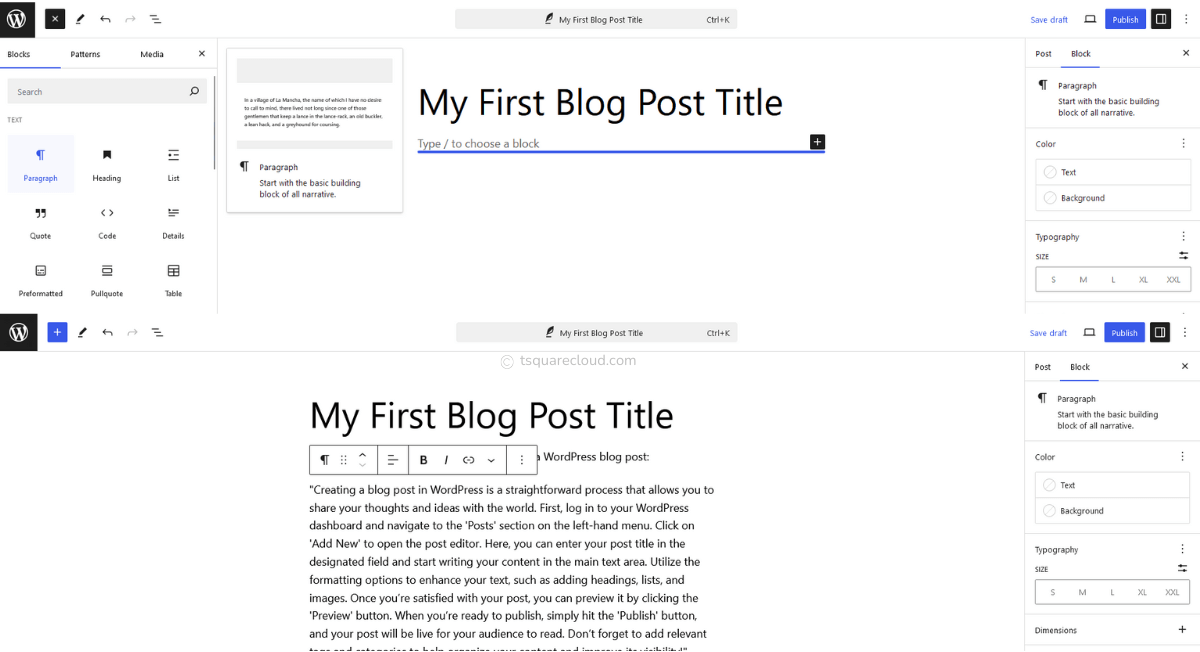
- Draft Your Content: Type your content in the editor. Use the ‘+’ icon to include elements like headings, paragraph, lists, or images.
Setting up featured image
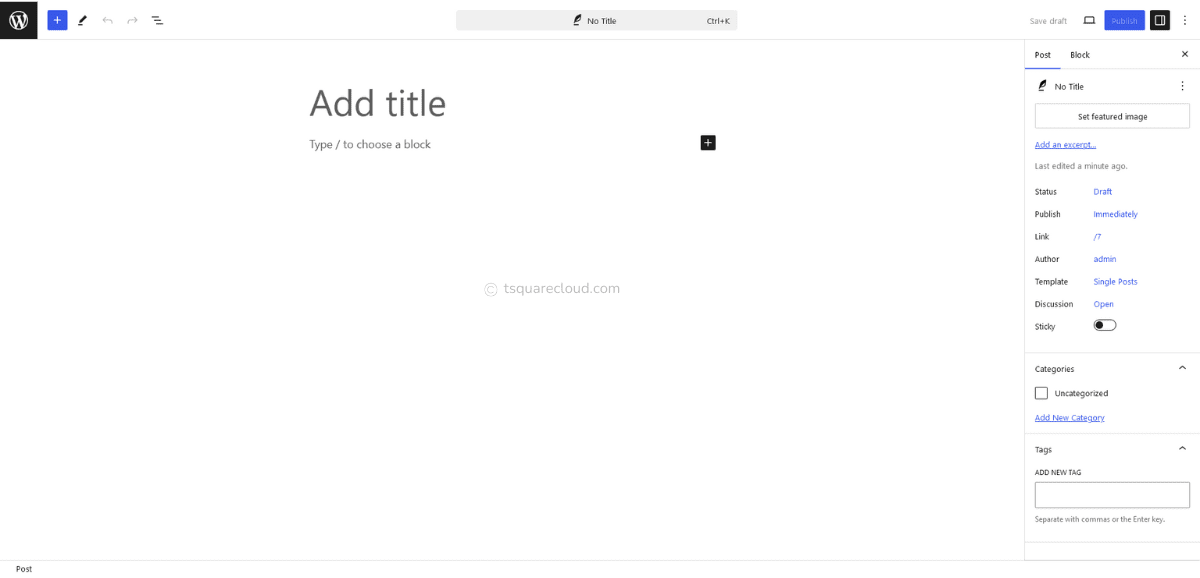
- Navigate to right sidebar: Find ‘Set featured image’. Click to upload or choose existing image in media gallery. Featured image is nothing but thumbnail image for that particular blog post.
- Replace/ Remove: To replace or remove the already set image hover over the image to see ‘Replace’, ‘Remove’ option.
- Size: Use 1200 x 675 pixels for a consistent and appealing look, or ask your web developer for theme specific size. Refer Crafting the Perfect WordPress for image optimization
Customizing Your Post
- Insert Paragraph: Click ‘+’ icon to include paragraph. You can either type directly or copy/paste from your word doc or Google Docs.
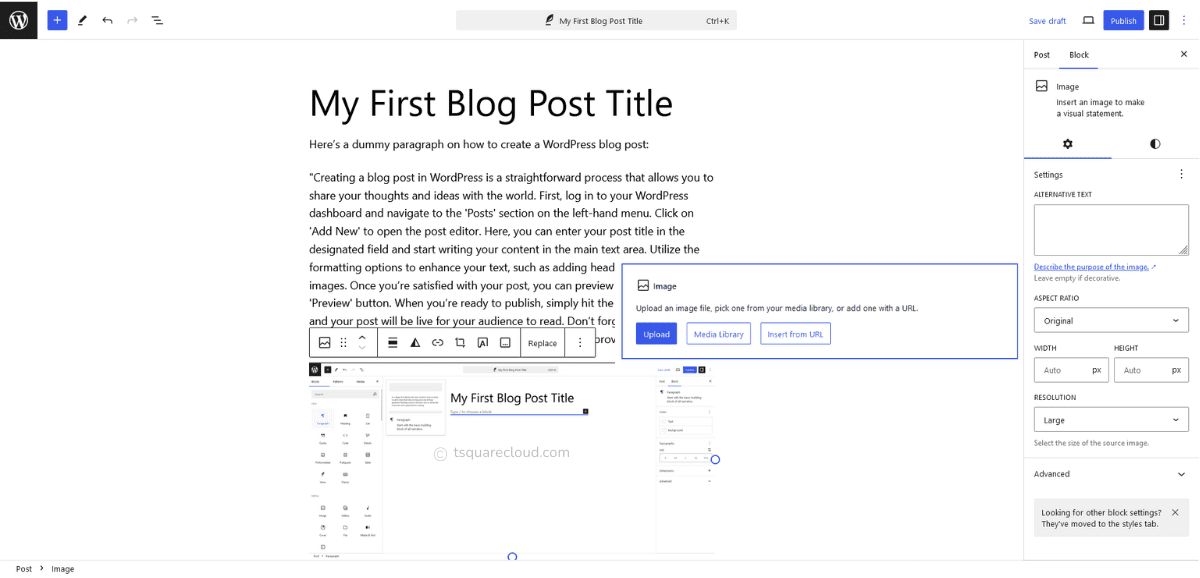
- Insert Images or Videos: Click ‘+’ icon to insert image to upload files. You can either upload new files from your local device or choose from your media library.
- Text Formatting: Highlight text to make it bold, italic, or turn it into a link using the toolbar options.
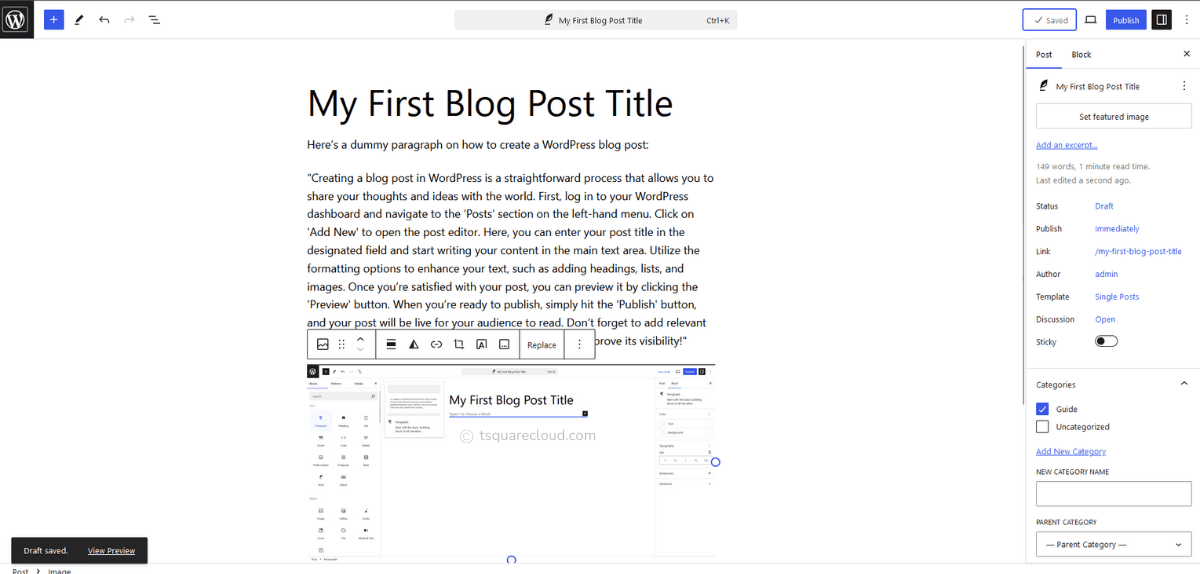
- Organize with Categories and Tags: Select categories and tags on the right sidebar to help organize your post and enhance SEO.
Previewing and Publishing Your Post
- Save Your Post: Click ‘Save draft’ at the top right as we are not yet ready to publish.
- Preview Your Post: Once you click save, ‘View Preview’ will appear at the bottom left to see how your post will look to readers.
- Make Necessary Edits: If needed, return to the editor to tweak your content.
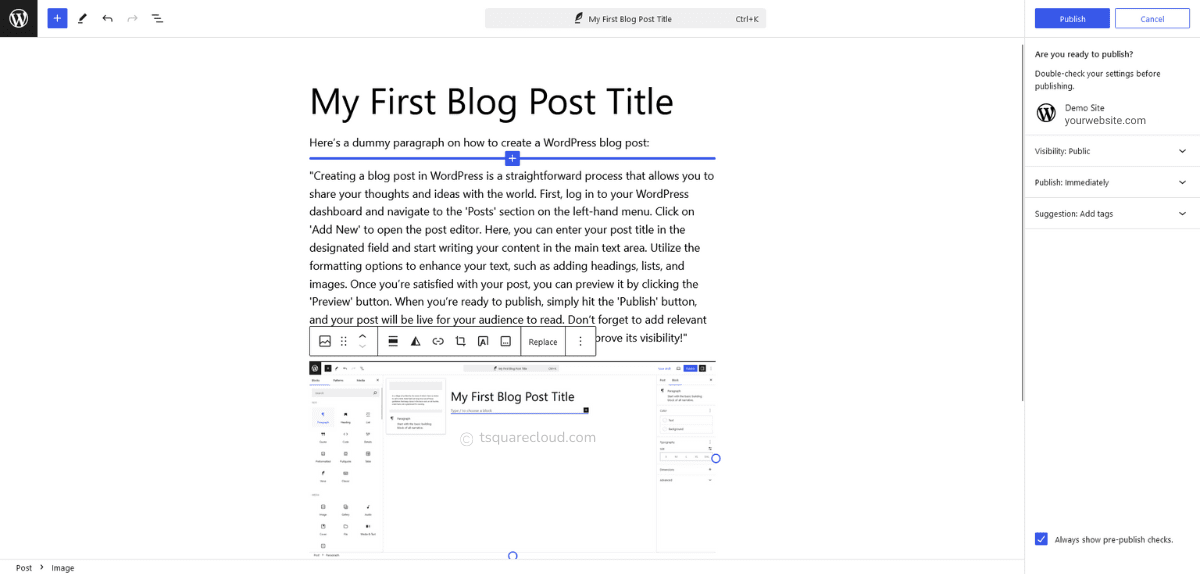
- Pre-Publish Check: Once you have finalized click ‘Publish’. You can also save it as a draft or schedule it for future publication.
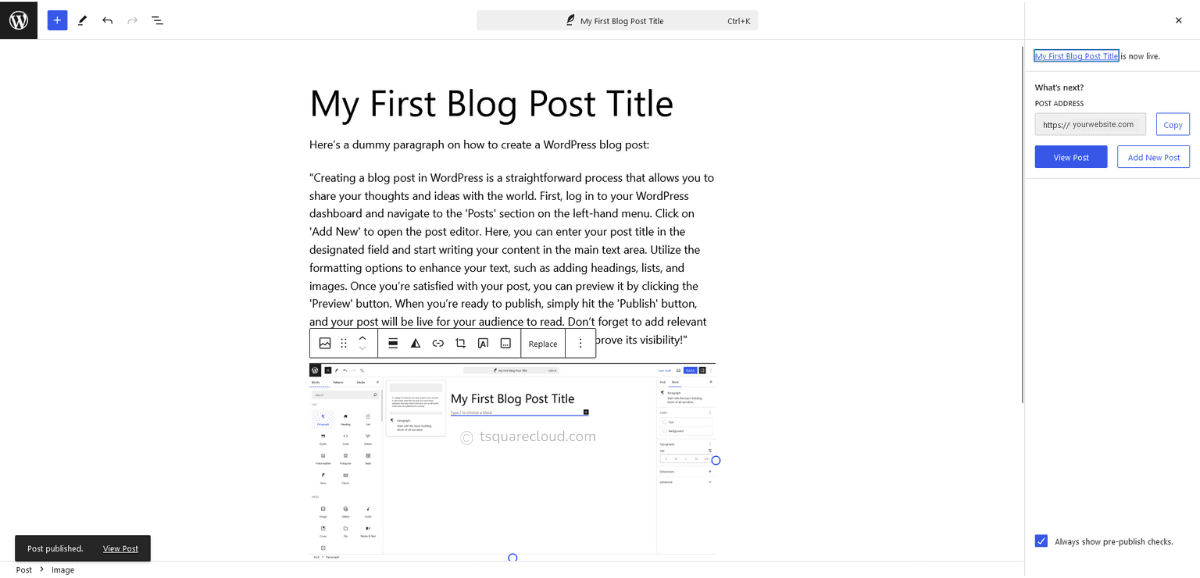
- Publish Your Post: When satisfied, click ‘Publish’ to make your post live. Confirmation message will be displayed at top right.
Troubleshooting Common Issues
- Forgot Password?: Use the ‘Lost your password?’ link on the login page to reset it.
- Problems Uploading Media?: Ensure your files are within the size limit and check available space in your media library.
- Formatting Issues?: Double-check your block selections and disable any conflicting plugins.
Conclusion
Congratulations! You’ve successfully created and published your first WordPress blog post. You’re on your way to becoming a blogging pro. Keep exploring WordPress to uncover more features and sharpen your skills. Happy blogging!

